6/05/2014

A Tule Lap Quilt

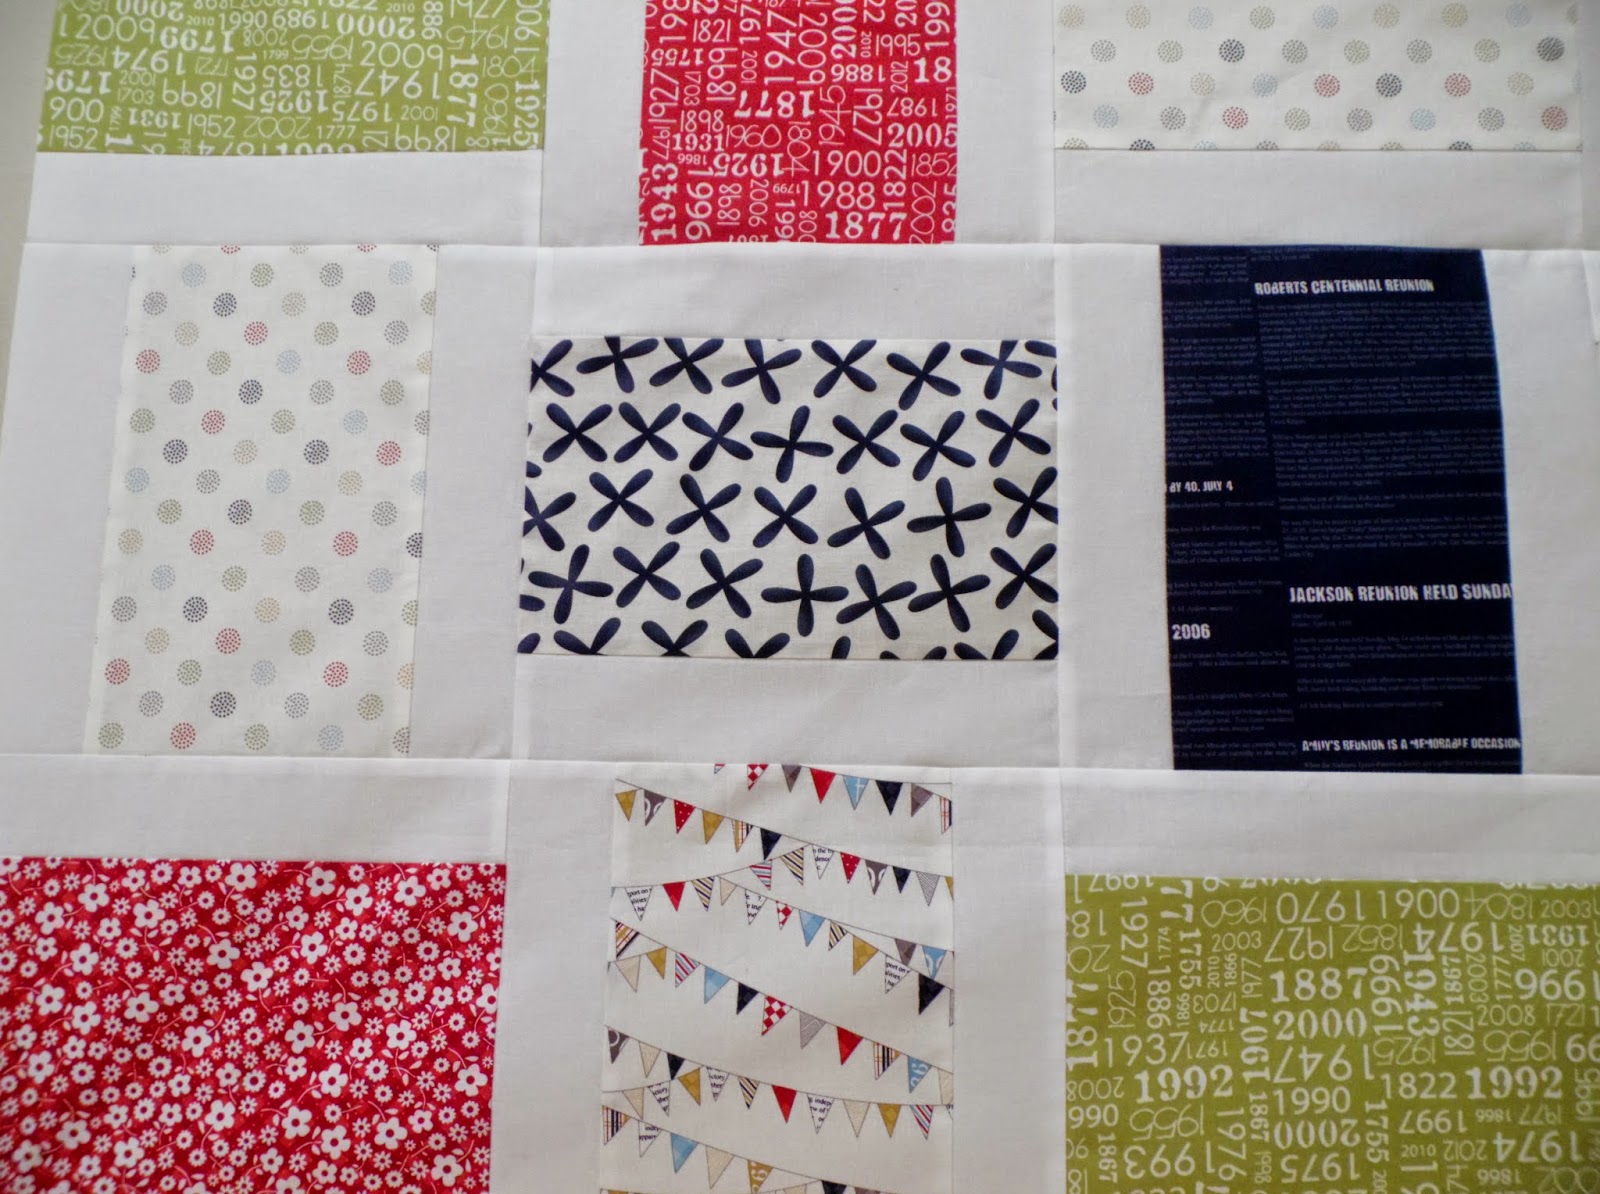
I got the idea for my newest lap quilt the minute I saw this wonderful quilt over at Pretty Little Quilts. Isn't is great? Love those colors! Her quilt pattern is from Camille Roskelley's book Simply Retro. When I looked it up, I realized the blocks are set on point. I wanted mine straight, which is how hers appeared in the photo. I had 10 fat quarters of Tule by Leah Duncan that I wanted to use.

 I couldn't find any graph paper so I drew one up (yes, it isn't all square) and got out the colored pencils. I tried it with 4 inch squares and it worked out perfectly for the fat quarters I have! I love it when that happens :) I actually ended up cutting into a 1/2 yard piece as well because I love the print.

I guess it's pretty much a granny square that isn't set on point. I'm sure someone has made it or there is a pattern somewhere out there. I made up my own for the size I wanted. I could have saved on cutting and piecing by using longer strips for the 2 and 3 piece sections but I wanted to keep everything the same so it would go together well. Sometimes my figuring gets off and creates more work, so I stuck with the 4 inch squares all the way through. Everything is cut and it's about half way pieced. I'm hoping to finish the top over the weekend. The only thing I'm concerned about is that some of the lighter prints will get lost in the white and lose the pattern design. But I still think it will be pretty!

I also have to share this new Butterfly Dance bundle I got from Vintage Fairytale. Staci had a bundle sale and I couldn't resist this, it's so darn cute!
Have a great weekend everyone!

5/31/2014

Art Gallery Littlest Quilt

I have been wanting to make a whole cloth quilt and I needed a quick gift. I love the prints in Art Gallery's new Littlest line. I chose my two favorite prints along with some Pure Elements Grapefruit from one of my favorite shops, For Sew It Seams. Melissa is carrying some Art Gallery now, she also has many other wonderful fabrics and her prices are great. I always like to share where I get my fabrics from. These little shops are all so kind, they deserve a shout out! :)
Anyway, I only got three shots.
The front:
 It is quilted in a 3.5 inch grid. I find it strange that one direction or the other of quilting always disappears in the photos. Another reason I'm camera hunting. Have I mentioned lately that I dislike my camera! Moving on.
An upclose of the cute little bunnies:
And the back:
I really, really love this panel print, it's so pretty! I also love binding with Art Gallery fabrics. It goes so smooth and easy. I literally can be done in about half the time because I'm not fiddling with annoying frays that are in the way. It lays so flat and cooperates so well. Sorry if I have mentioned that before, but it's true!
I thought making a whole cloth quilt would be so fun and rewarding. I discovered, for me, it just wasn't! I felt like I was cheating. It just isn't the same as making a regular quilt. There are some GREAT whole cloth quilts out there that I adore, so no offense to their great makers! I will probably make another someday. There will be other prints I love and don't want to cut up. However, this definitely isn't my "thing".
This quilt finished at 40 x 43. The recipient likes gray and pink, so this came pretty close. It's more peach than pink, but it's still cute.
I'm debating now if I want to do an Art Gallery Tule lap quilt or a Kate Spain Daydreams mini. We shall see...thanks for stopping by!
Linking up to Show Off Saturday at Sew Can She

5/30/2014

Some New Storage Pieces

I have a few quick things to share with you all today. And yes, they are cell phone pictures for today, sorry!
Quite awhile back I was with my husband at the scrap yard and spotted some iron fence pieces. I immediately saw a quilt ladder in my mind. They had many layers of paint and gunk on them. My husband finally got them stripped down. He cut them up and re welded it back together to make it a usable size for me!
Now it needs cleaned with acetone and I have to choose a paint color. I just can't decide between white or black?? I will be using this for taking photos also, so what color would you choose?

I spotted this dresser at an antique store in town. I thought it would be great for my sewing room! It's all wood, so that's a plus. I have been wanting storage for my vintage feed sacks and fabrics.
I had originally planned to use this for a cutting area. It was just a bit short, depth wise, for my cutting mat. So I turned it into an ironing area instead. My tabletop ironing pad had become very dirty and stained, so while I was waiting for my husband to pick this up, I made a new cover.
I used a piece of fabric I had found on one of my SAS trips. It really doesn't match well, but I won't use it in any of my quilts, so I used it up. I made this ironing board when I first started sewing. I found this tutorial from Missouri Quilt Co. if anyone's interested.

The last find I have to share is a stainless steel shelf. My husband also found a bunch of these at the scrap yard, still in the box unassembled.
The guys said Walmart had throw them all out. They were display stands for coconut water! They are brand new and very sturdy. They even had the pieces of hard plastic to lay on the shelves so nothing falls through. I was so glad he got these. He paid like $4.00 a piece for them! I officially have more storage pieces than I can fit in my sewing room :)
Now I'm off to try and get some decent pictures of my whole cloth Art Gallery Littlest quilt finish. See you soon, have a great weekend everyone!

5/24/2014

I'm Back & A Finish!

Hello friends! I hope everyone is having a safe and enjoyable holiday weekend.
I am planning to be back in business again with regular sewing and blogging. If you follow me, you will know life got pretty messy for me and my family. Between the loss of my brother, several family health problems and my own health issues, it was not a pleasant time. I had surgery number 2, and I'm doing much better now!
I feel like it's been forever since I had a quilt finish. I have finished up my quilt using Reunion by Sweetwater.

I've been collecting Sweetwater fabrics for quite awhile now and decided it was time to use some up.
I have been having a real fit with my camera lately (it's time for a new one, any suggestions??) and it's muddy and wet today so pictures didn't come out so great. The only one I was able to capture of the entire quilt ended up with a big brown line through the center UGH. So partial shots will just have to do.
I pulled the reds, blues and greens that I had from my Reunion collection for this quilt. I just love these colors. There is a simple tutorial at Quilting In The Rain I based mine off of. I did change my sizing a bit. I wanted this to end up 50 x 70, but as always, it came up about an inch short both directions. No matter how accurately I piece and cut, this always happens to me.
It's so nice to be sewing again! And this quilt is just a happy quilt :)
I quilted straight lines on both sides of each seam, then diagonal through each block. I always feel the need to stay close to my seams, to secure them better. It's a personal OCD thing. I can't wait to learn free motion, so I can just let the designs flow!
I used my last package of Warm n White on this one. Now I have that whole big roll I got for Christmas that I can't wait to use from this post. I love the softness and drape of it! I used Gutermann white cotton for piecing and quilting. I chose a red print from Reunion for the binding.

I had small strips left from cutting the blocks, so this is what I put into the back. Nothing fancy, but I didn't have to use anymore of my stash either :) I didn't get a good shot of the back either, sorry.
I think this quilt will be a gift, for a very special person, that really deserves it. She probably won't even care there are a few flaws in this one!
Hope you are all doing well and I hope you will find your way back to me after my absence! I will be back in a couple days to share some fun new storage finds I have acquired. Along with some fun new fabrics and a baby quilt I should be done with by Monday evening.
Here's a sneak peek!
Thanks for dropping by friends, see you soon!
Linking up to Sewjo Saturday at My Go-Go Life and Fabric Frenzy Friday at Fort Worth Fabric Studio. Also my first time linking up to Fabric Tuesday at Quilt Story!

4/20/2014

Happy Easter & Help...

Happy Easter everyone! I hope you are all having a great holiday weekend. It's quiet around here, just my husband and myself. He is sleeping so I spent quite awhile going through bloglovin and catching up on all your great work. I have noticed I keep getting emails regarding the comments I leave on people's blogs. It says my post notification could not be delivered to the recipient. And I've also noticed I'm not getting email notification of all your sweet comments on my blog. Has anyone else been having this issue lately?? I'm not sure what to do or how to fix it! I hope I have been able to respond to each of you, because I truly appreciate your visits!
I have my Reunion top finished as well as the back. Sorry for the quick and crappy cell phone picture! I'm hoping to do some quilting on it today. Better pictures coming soon, it's raining today, thank goodness! We need it so badly right now.

I have been bad about getting sidetracked lately. When I first started quilting, I NEVER moved on to a new project without finishing my current one! I saw this Mini Medallion quilt along and really want to join in. You can find the post here. It's a mini so it will use up some scraps.

Being Easter, I thought it was a good time to remember what others do for us. My friend Cristina sent me this wonderful package in the mail. I was so surprised when I opened it up! She has been a great friend through life's recent troubles. I am so very grateful for the wonderful quilting friends I have met since blogging and quilting. You are all wonderful! What a great community to belong to :)

 I hope you don't mind my sharing your thoughtful gift Cristina. What great choices she made for me! The Fat Quarter Shop packaged this up so beautifully also. That new book is awesome friends! Some books have a project or two that you can't wait to make, and then some that are just ok. This book is FULL of wonderful quilts and I will probably make every single one! It's from Sherri McConnell of A Quilting Life. I had to share that link, it takes you to one of my favorites in the book, so pretty!!
We have to remember that everyone goes through awful times in this life. Sometimes all it takes to brighten a person's day and make a difference is a, "Hello, how are you?". Or a simple smile. Kindness goes a long way and I appreciate all of your friendships, comments and virtual hugs. Have a great weekend friends!

4/10/2014

Reunion Progress

I have been slowly working on my Sweetwater Reunion quilt. I turned these blocks

into these rows.
I was encouraged by a post I saw on Pat Sloan's blog. She has put up a 10 minute a day UFO challenge. You can find the post here. With life a bit crazy right now, I figured I can at least work on something for 10 minutes a day, so I joined in. I have 3 UFO quilts hanging in bags in the closet, maybe this will help to get them finished up as well. I still haven't even finished the 2nd potholder from my tutorial, I need to do that also. I got some of the rows (well only the bottom 3) joined and should be finishing this up soon.


I have been seeing quite a few quilts lately similar to what I'm making. I didn't use any particular pattern because I wanted mine to end up about 50 x 70 finished. I did my own measurements and will share when it is completed. My inspiration came from a couple tutorials here and here. The second link is a Riley Blake tutorial that adds a fun strip into the front. I think I will try that next time I make this pattern.

It's good to be sewing again. I splurged today on something totally not necessary. I ordered a fat eighth bundle of the complete Waterfront Park line by Violet Craft for Michael Miller fabrics. I had a gift card credit left on Etsy and figured it was time to get it used up :) I happen to see the backing I wanted on sale at Crafter's Vision for 6.28 a yard. They have a Michael Miller sale this week, so it was another 20% off of that too! That gave me the push to go purchase the Waterfront Park bundle that has been in my cart for the last few months. Does anyone else have carts full at several quilt shops...at all times? I'm betting I'm not the only one :)

Linking up to Needle and Thread Thursday at My Quilt Infatuation

3/29/2014

It's Been Awhile

I was just getting in my groove of blogging with lots of quilt plans, when life happened to my family. My brother passed away Feb 28th and my Mom had a heart attack the next day. Many other not so enjoyable things happened as well, but I will keep the sad part of this post at a minimum.
Before I left, I was working on this flower quilt.
I had originally planned to do a baby quilt but when I returned my mind was at a blank on where I was even going with this. I have another charm pack of this Noteworthy fabric by Sweetwater for Moda. I'm thinking I may just continue and make a nice size lap quilt for a gift instead. I put it away for the moment.
I also wanted to share a couple pics of some feed/flour sacks I had started collecting. The first two photos are full sacks that have not been opened up. I'm going to save a few for my girls and grand daughters. Some have a little history with them that will be fun to include before I tuck them away for later years.


 I also purchased a few opened sacks that I'm saving to put into a quilt. The top fabric is 3 yards of vintage fabric that I won on ebay, I only paid 3.50 a yard!

 My Mom and sister had been finding me lots of good vintage sheets and pillow cases as well. I've really come to love vintage fabrics and feed sacks. I started to cut up some of the sheets, kept what I wanted, and listed a few pieces in my Etsy shop. That's the only thing left in there right now. I was fortunate enough to sell all the quilts I'd made up. I am going to be adding lots of vintage sheet pieces when I am able to get them cut up.
I realized I'd been hoarding and not made one quilt from my Sweetwater fabrics! They are one of my favorite designers and figured it was time to start using some of my stash. I needed a simple quilt with so much going on right now. I got the blocks all ready, now I just need to join them.
I really liked my trial layout and think this will be a cute lap quilt. I had a small surgery yesterday so it will be a bit before I'm able to put this together. Hopefully soon though!
I hope everyone is well. I spent yesterday catching up on some blogs that I've missed out on.
Thank you Cristina for wondering what happened or where I'd been. Your friendship and kindness gave me the get up I needed to start sewing again and get a blog post up. I treasure you :)

Linking up to Fabric Frenzy Friday at Fort Worth Fabric Studio
And Sewjo Saturday at My Go-Go Life

1/30/2014

Potholder Tutorial


Hello friends! I was cutting out pieces to make a set of pot holders and decided to share how I am making mine with you. I know there are tons of tutorials out there but you never know when someone new to sewing will find your blog and appreciate an easy, quick and fun tutorial! I like the style of my current pot holders, the kind you can stick your hand in so there's less chance of getting burnt. So I measured them the best I could. When I stopped to actually look at them...yikes...they are a bit scary and ratty looking, yuck!
Ok folks, this is what you will need for one potholder, double this to make two (2 Coordinating fat quarters will make 2 potholders).

  • (2) 9.5" x 8" pieces of cotton fabric, one will show as the backing and one will peek out the top above your pocket. I am using a dark gray Chicopee print for my back and Puppy Park crosshatch green for the front.
  • (1) 9.5" x 8" piece of Insul-Bright ( I recommend using this because the shiny side deflects heat away) You could also use a couple pieces of cotton batting, although I haven't tried that method yet. Never use polyester batting, it could melt and your potholder will not be pretty anymore!
  • (1) 9.5" x 8" piece of cotton batting, You could also use another piece of Insul-Bright instead of this if you choose. The manufacturer recommends a piece of cotton batting to absorb any moisture that may arise from the heat. That's why I am using batting along with the Insul-Bright.
  • (2) 8" x 8" pieces of cotton fabric, These are your pocket pieces. One will show to the inside and one will be the main part of what you're going to see on the front of your pot holder. I'm using the dark gray print on the outside and the green inside. 
  • (1) 8" x 8" piece of Insul-Bright
  • (1) 8" x 8" piece of cotton batting
  • (1) package of 1/2" double fold bias binding, (1 package will make 2 pot holders) I chose black. Packaged binding stretches much easier around corners that are rounded. Here's what I'm using (I forgot to add it in the 1st photo)

Layer your 9.5" x 8" pieces as follows:
Backing piece, right side facing down
Insul-Bright, shiny side facing down
Cotton Batting
Front fabric piece, right side facing up
I'm using basting spray to hold all my layers together. 

Now layer your 8" squares:
Pocket piece that you want to show to the inside, right side facing down
Cotton batting
Insul-Bright, shiny side facing up
Front pocket piece, right side facing up
Again, I'm using basting spray to hold my layers. You could pin or do a basting stitch as well to hold your layers all together.
Here are the layers, in order, ready to be basted together.
 

Next you will quilt your two layered sandwiches. I'm using my walking foot and quilting simple straight lines about 1/2" apart (ignore the guide bar, it's being held in place with a glue dot and I just didn't remove it). This would be a great time to practice free motion skills, since I'm doing a tutorial I will not be doing that. I still need lots of practice :)


After you're done with the quilting, take your sandwiches to your cutting mat and square them up. Mine got a bit off so I squared my 8" pieces to 7.5" and the 9.5" x 8" squared to 9" x 7.5" When you lay them together you should have something similar to this.


Next you need to add a piece of your bias binding to the top of your pocket piece to finish off the top of this section. I cut a piece of my packaged binding 7.5" long. Take your pocket piece and place the side you want facing to the inside of your potholder so that it is right side up facing you. One side of your binding will be a little wider, this is the side we will attach first. Open up that wider half of the binding and lay it even with the top of your pocket piece, pin in place. 


Using matching thread, sew right down that crease line, the one closest to your top edge. Sorry, this picture is upside down.

 Next, fold your binding back over to the front, it should now look like this:


Sew close to the edge to attach the front down.
Since you put the slighter wide section on the back side, your front stitches should have ended up nicely onto the binding on the back side. If it strayed off your binding, don't worry too much, it will be facing inside and won't be seen too much.

Now we will sew the pocket piece onto the main piece. Sew near the edge, maybe around 1/8th of an inch seam allowance (no need for extreme accuracy here). This will be hidden under your final outside binding when you attach it. We are simply getting the two pieces attached together. Lay your pocket piece on top of the main piece, making sure you have the sides you want showing properly placed. Stitch across the bottom first to hold things in place. For the sides, I like to start at the bottom and go up. I always have problems if I try to start where there's a lot of bulk. Since there is binding across the top of your pocket, there's more bulk than the bottom will have. Back stitch when you reach the top of your binding strip for added strength.

Time to round the corners, or leave them square, whatever you prefer.
 I like the look of rounded corners on a potholder. I'm using a candle lid to make my corners, you can use anything round you can find laying around. Place it where you would like it, mark it and cut.

The final step is to add your binding. I cut a piece roughly 36". I have some, but not a lot of experience with packaged bias binding. This is a helpful tutorial that will give better instruction than I could. Many people pin it down, but I just like to sew slowly and adjust it in place as I go and manipulate it into place around the corners.

I started near one end on the back side using the same method as we did on the top of the pocket. The wider side unfolded, lined up with the edge and stitched down along the closest crease mark.
I saw this trick somewhere, I can't link because I don't remember where I seen it. At the start point, fold it down like this.
Start sewing at the very beginning of the binding, where the first crease mark would be if it went all the way to the end, right over the top of that fold. Continue all the way around and when you get back to this point, continue past the folded down line a bit and back stitch. Trim off any excess past your back stitching. When you fold your binding over to the front (again like we did on the pocket top), you will end up with this.
Just make sure it's tucked under there good, smooth that wrinkle out and line up the edges well before you sew over it. It creates a nice finished end without a lot of binding fuss. I started attaching the front here, sew all the way around and back stitch at the end. Your binding is complete!
If you want to add a loop, just cut a binding piece to a size that looks pleasing to you when made into a loop. Center it on the top, in the back, lining it up with your binding edge and take a few stitches. Back stitch to secure in place. There are also other ways to do loops if you do a quick online search. You don't have to make a loop, I often wonder what the need is because I never hang mine anyway.


Repeat for a 2nd potholder and you now have a pretty set of new potholders!

I would love for you to share photos with me if you make a set! Thanks for stopping by!

Linking up to Needle And Thread Thursday at My Quilt Infatuation and
Finish It Up Friday at Crazy Mom Quilts and
Fabric Frenzy Friday at Fort Worth Fabric Studio